I love panettone. Love it. It’s my very favorite Italian thing on the planet. I’ve always wanted to try and make it, but it’s kind of intimidating and an extremely long process (several days from start to bake… at least!). This year, I’ve finally decided is the year. I will conquer this bread. I will. Eventually.
Step 1 – Fail
But first, apparently, failure.
This is a complicated and time consuming bread to make. Yeast must cooperate and be very strong. Gluten must be fully developed. Up until a few days ago, I really didn’t know what any of that meant. I still don’t really understand, but I’m starting to. I decided on a recipe and mostly followed it exactly. By the way, I fancy myself a very good follower of instructions, so I thought this would be right up my alley… little did I know… making bread kind of boils down to being a little art, a little science, a lot patience, and a shit ton of luck.
First of all, I cheated a little bit on the starter part of the recipe and made an overnight sponge from another recipe (look, the starter for this recipe takes DAYS to make and I didn’t want to wait that long). I used that to make the first dough, which doubled in volume overnight, like it was supposed to, so I thought I was off to a pretty good start.
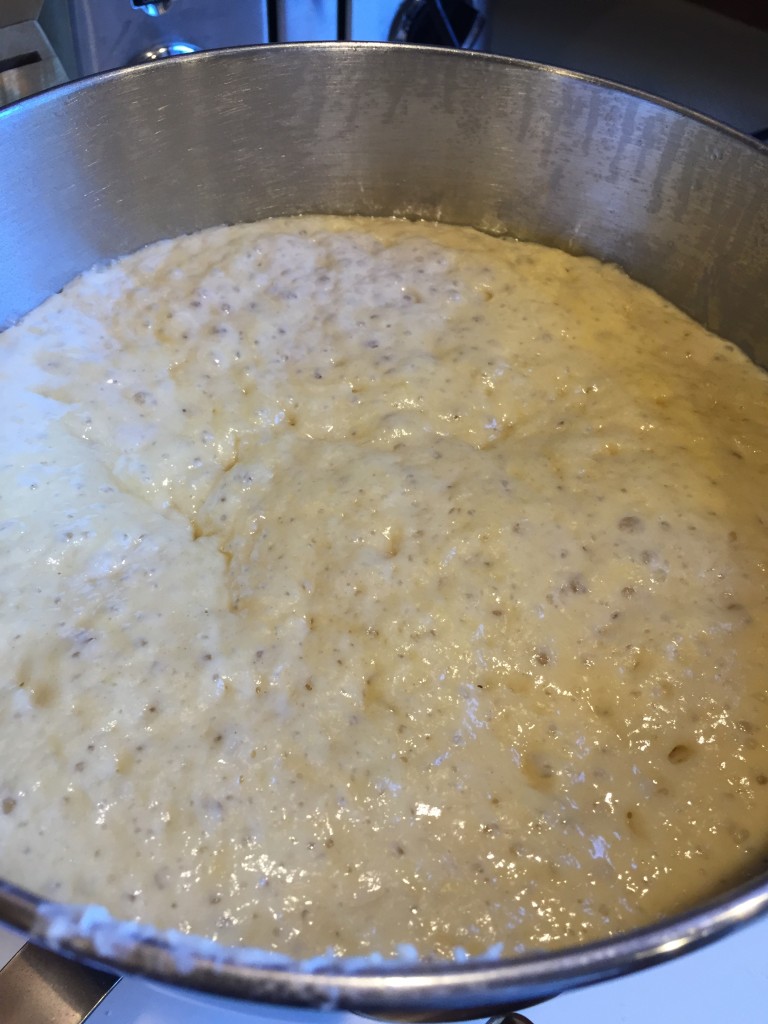
First dough after rising for something around 12 hours.
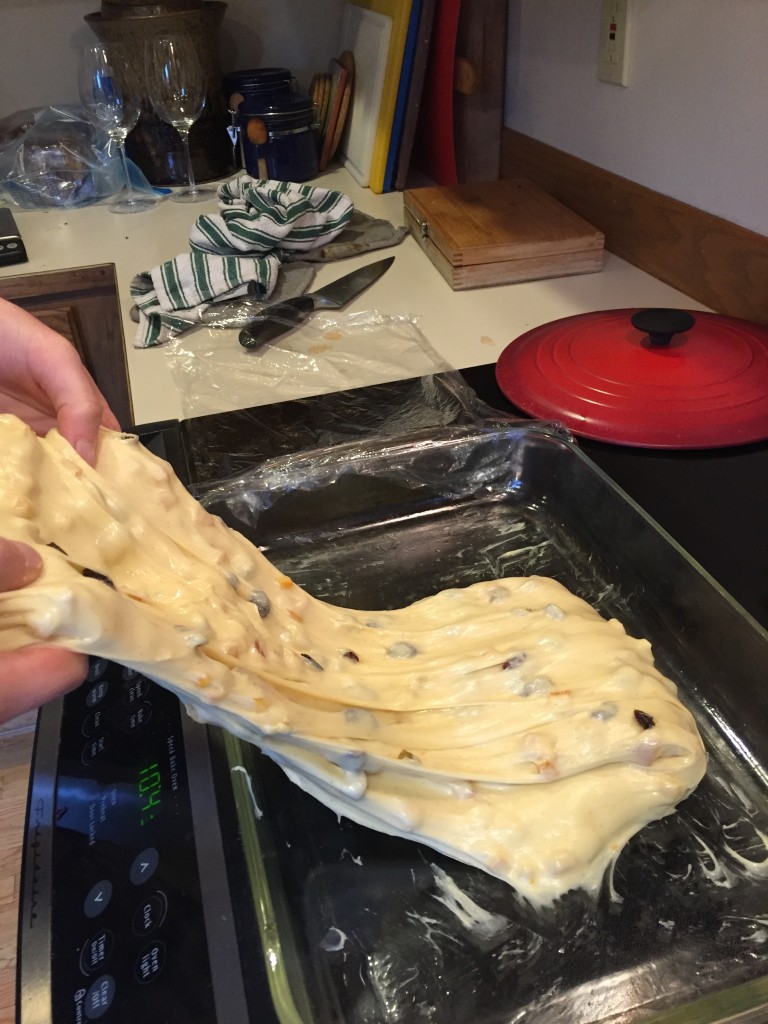
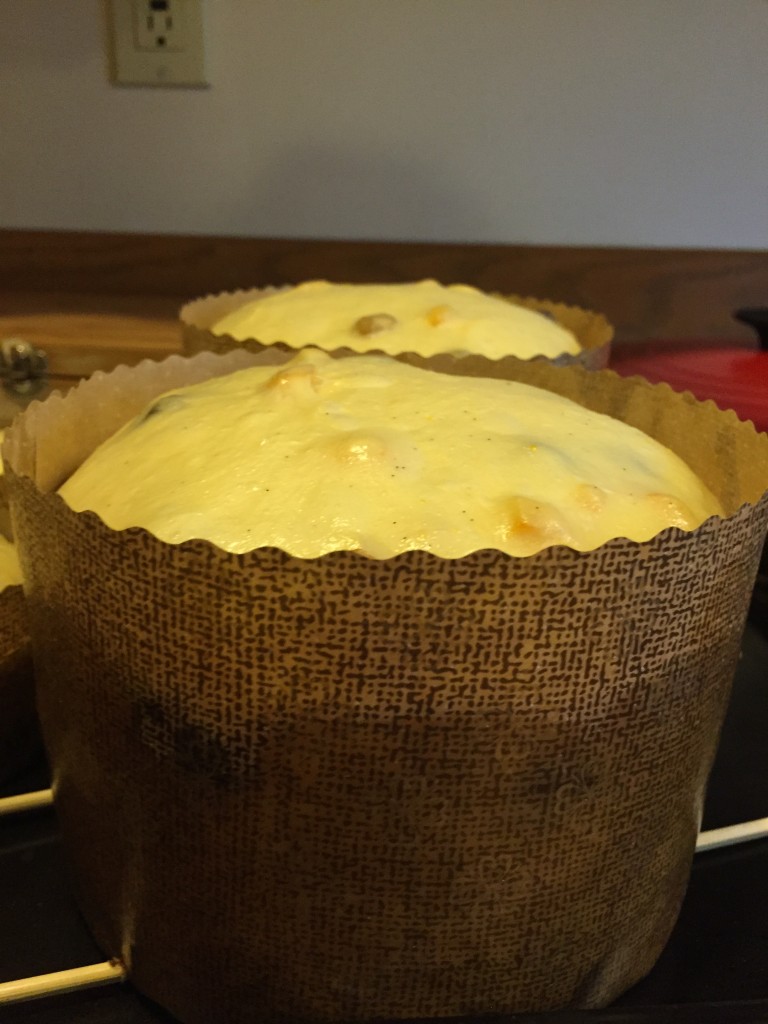
The next morning, I got all the ingredients perfectly weighed out and in place for the second dough, dumped everything into the mixer and flipped the ON switch. It started to mix like you’d expect and clumped itself around the dough hook like it’s supposed to per the instructions. Next step — add sugar S L O W L Y. Mix for 2 minutes between each addition of sugar. Done and done. But this is where things started to go very wrong. The dough got really loose at this point — really goopy and incredibly sticky. I tried several times to check the gluten “windowpane” and mostly ended up with dough all over my hands. But I thought I was pretty close (almost fully developed??). Added the butter and then the fruit bits. The dough was the consistency of a milkshake.
See, you need fully developed gluten to be able to support the structure of the bread and all the goodies that you add to it (raisins, candied fruits, etc.). I knew that, but didn’t know what fully developed gluten looked or felt like or that both sugar and fats hinder gluten development.
I continued on to the next step anyway. Poured the milkshake (dough) into a lightly oiled container for something called “bulk fermentation.” I don’t know what that means. You wait 30 minutes and fold it (like a letter). Have you ever tried folding a milkshake like a letter? 20 minutes later, I tried to stretch and fold it. Yeah… that was fun and really really sticky. As I folded it, it seemed to get less sticky, so I folded it more. I have no idea if this was a good thing or a bad thing. I let it rest again and repeated the folding. After an hour, it was still wet and sticky, but I continued to the next step.
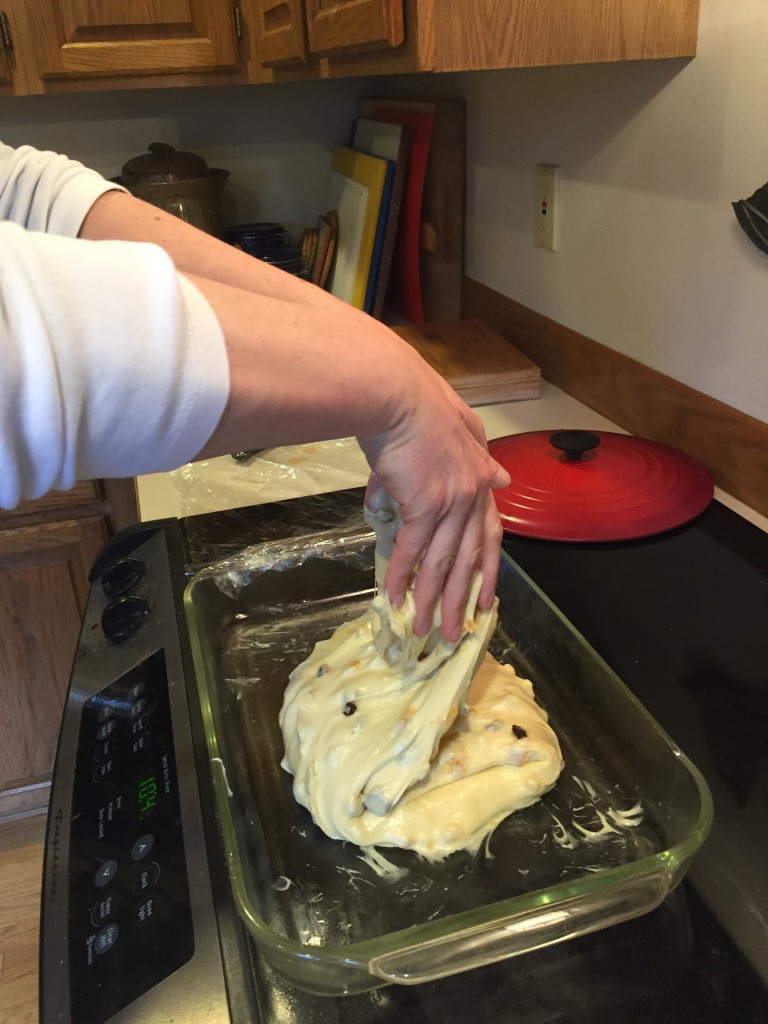
Turn the dough out on a lightly buttered surface and divide in three portions. Naturally I had to weigh them to get perfectly portioned loaves. You know how nothing sticks to parchment paper? Yeah, I found something that does. This dough. Anyway, rest the dough on the counter for 30 minutes. That’s pretty straightforward.
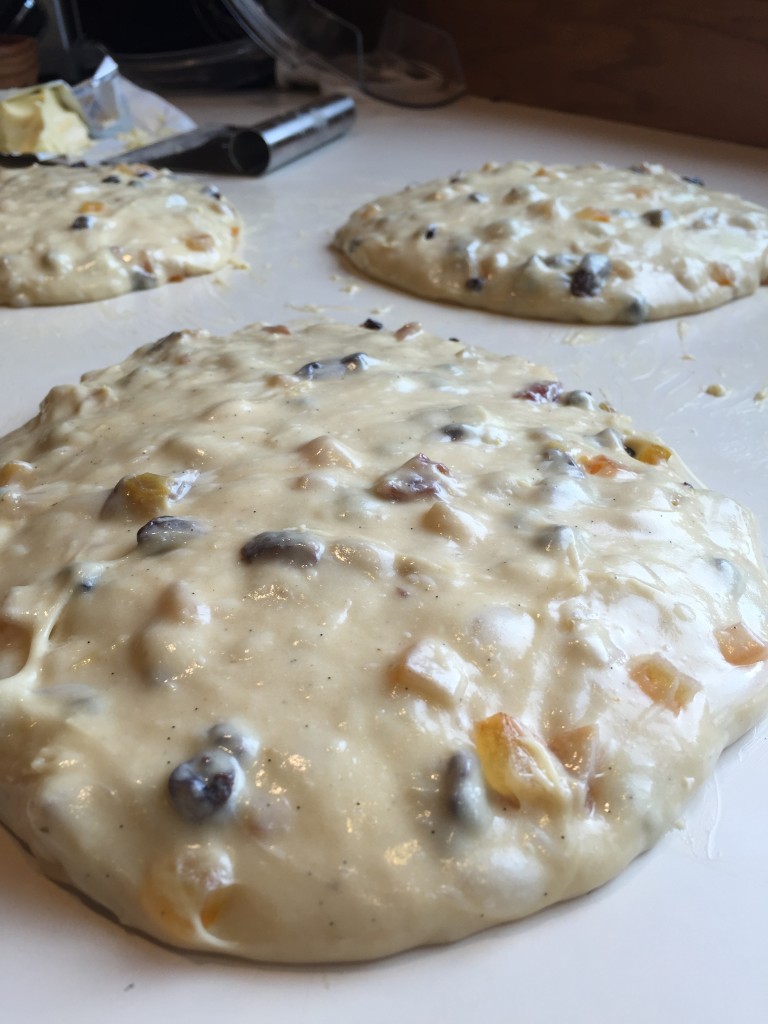
Panettone pancakes? I bet they taste good. They definitely smell good.
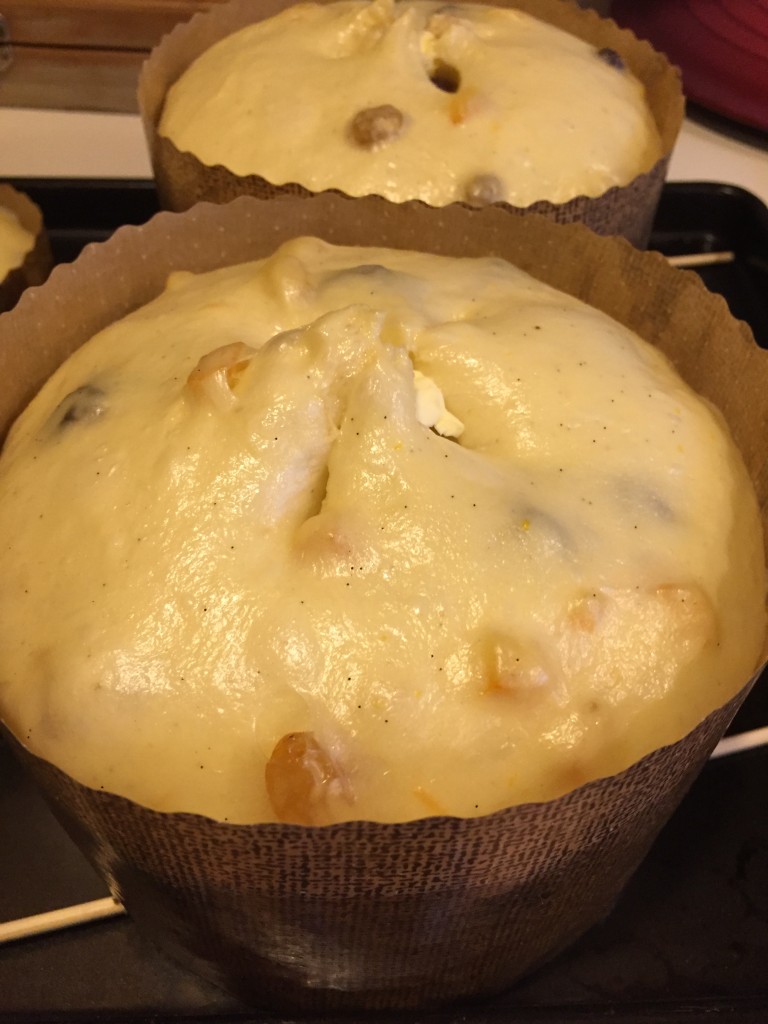
Next, the dough is formed into tight balls and placed into the paper molds. I’m not even sure it was possible to form a loose ball, much less a tight one, but I did my best. Then put them into the oven with the light on to proof for like 6 hours. After about 6 hours, I pretty much knew that this was a disaster, as they had not risen to the level they were supposed to. But I baked them anyway.
Rise, dammit!
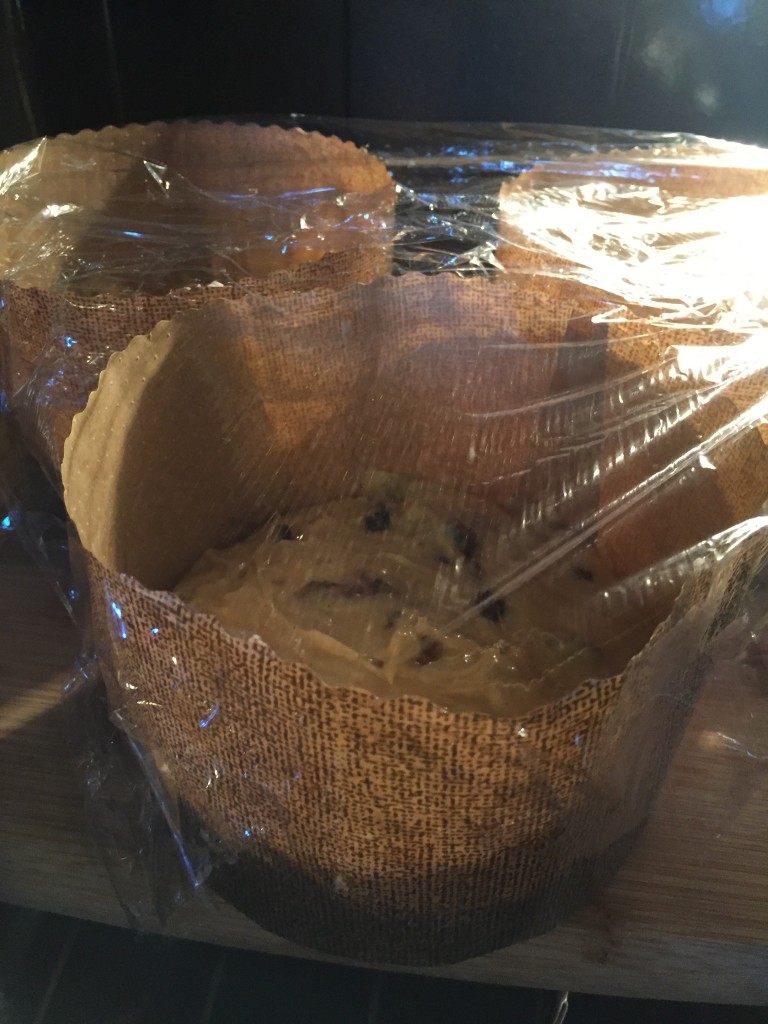
They came out totally flat. They didn’t rise anymore in the cooking process, but they smelled so good!! After they were baked, they were hung upside down overnight to cool (see you do this because the dough is so heavy, you don’t want it to collapse… I’m pretty sure mine had nowhere left to collapse to, but I hung them upside down as per the instructions).
Disappointed…
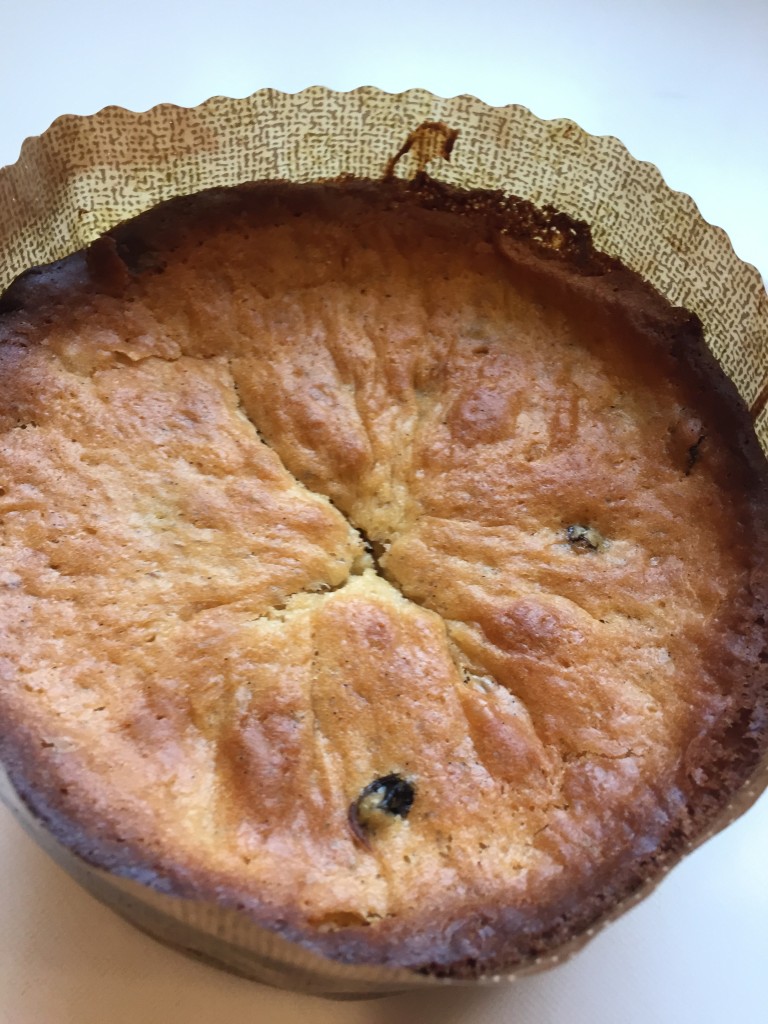
The next morning, I cut into one. It really smelled great. And it tasted pretty good too. But the texture was more like a cake than a light, tall bread.
It’s a fruitcake
I won’t lie, I was terribly disappointed. After so many hours and steps and and and, I considered giving up entirely. My husband found some blogs about making panettone. One called it the “Everest of baking”. Another basically said “you’re crazy for even thinking about trying to make this bread.” And on and on. I felt better knowing that very experienced bakers totally cannot make this bread either.
Step 2 – Fail Again (but maybe not quite as badly)
Second time around, I did make a starter. I did use yeast to get it going, but then fed and watered it twice a day for some number of days. Then the day before the day before I was going to bake, I converted this liquid starter to a stiff starter (basically this means you use less water). I don’t know much about starters, so I have no idea if mine was really doing anything, but I kept at it and the day before I baked, I converted the stiff starter into a sweet starter. This meant that I had to feed it every 4 hours for at least 12 hours. I think the reason is that you don’t want a very acidic starter for a sweet bread, so you give it food more often and it doesn’t get much of a chance to go sour. But don’t quote me on that.
I knew the first batch had utterly fallen apart in the gluten development stage. I had no idea whether the yeast was really doing it’s job because the gluten never got to the point where it could provide any structure to the bread. This was my first priority with the second batch — develop the fucking gluten! And add the sugar even more slowly. That seemed to work. I added that sugar over the course of about 45 minutes (I’m not even exaggerating). The dough was neatly wrapped around the dough hook the entire time (that I’m also begging the universe to not let the mixer overheat and/or break, which it didn’t… whew!). I tested the gluten and stretched the dough until I could read through that windowpane. I was so patient! And the dough was so much easier to work with when it wasn’t like dealing with a milkshake. It’s still very very soft and sticky, but in a way that it doesn’t stick to literally everything it touches and is able to hold it’s form. I felt like this was going well. I stretched and folded, rested the dough, portioned it out into 3 exactly equal tight balls and placed them in the paper molds and then into the proofing oven (an oven with the light on).
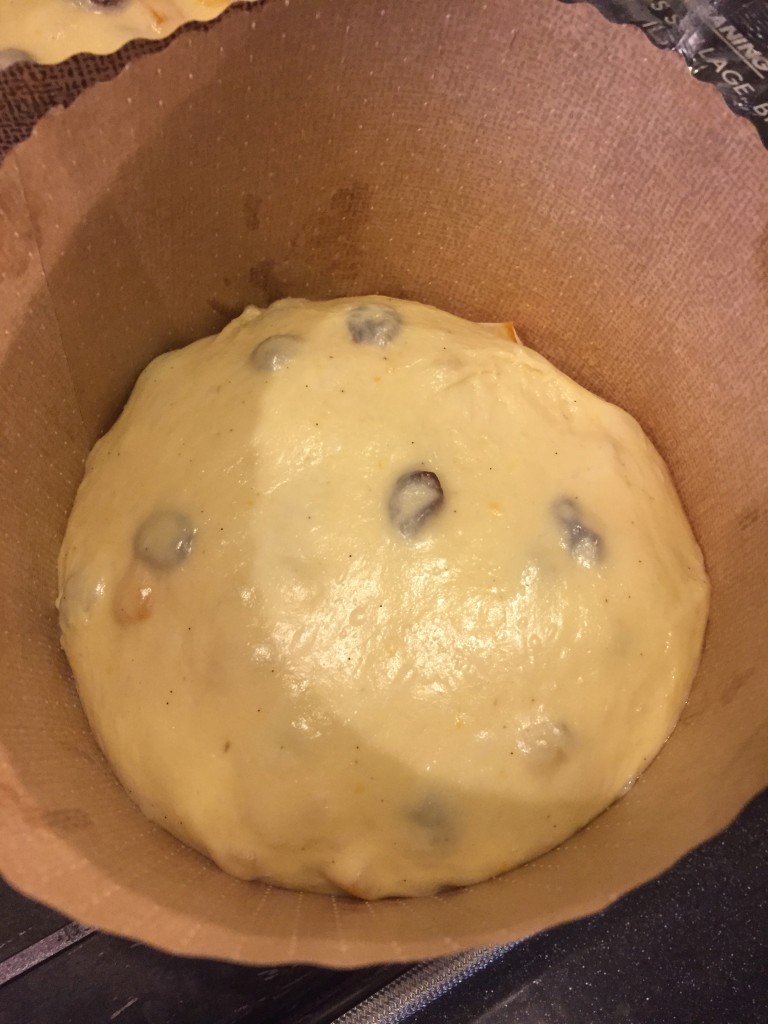
ready for proofing
Then I went out and did errands with the Husband for several hours (the bread has to proof for 4-6 hours… it was probably a good thing I went out, else I would be checking on the dough every 2 minutes and, you know what’s slower than watching grass grow? Watching bread rise.)
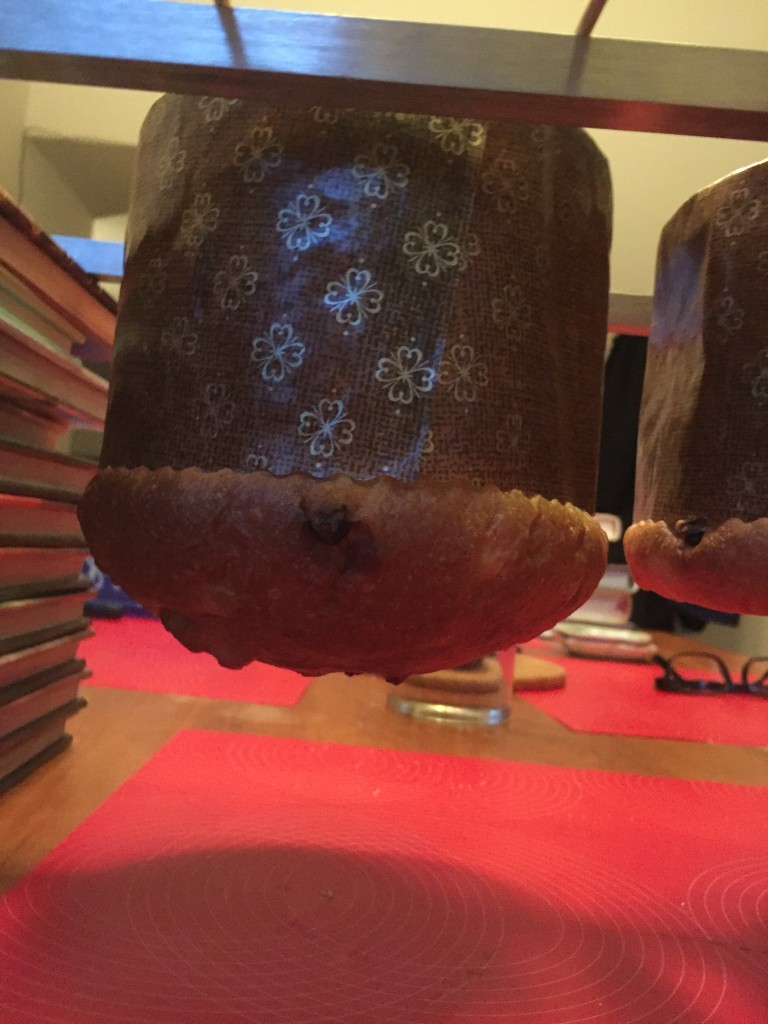
We got home and I checked the oven. It was almost 100 degrees. It’s supposed to proof at 80 degrees. Oops. But they looked pretty good. When they seemed to be fully proofed (the top of the dough dome is about even with the top of the paper mold), I preheated the oven. I took these babies out of the proofing oven to snip the tops and tuck a pat of butter inside (beyond giving the bread a nice look, I really have no idea what slashing the top does, but it seems to be important. I should probably research that more). And I snipped the tops with scissors (as instructed)… and they collapsed. I thought maybe they would still pop up in the oven. Nope. Nope. Nope. They cooked, I burned myself 3 times getting them flipped upside down to cool, but they were deflated. I was deflated. I was in tears. My saint of a husband tried talking me off the ledge, explained I can try again, and that I don’t really hate Italy and all Italian bread products.

deflated
The next morning, after a cooling off period for both me and the panettone, I inspected the breads. They didn’t look that bad. They didn’t have the lovely mushroom top they are supposed to have, but they were definitely better than my first attempt. Progress. We cut into one and had a sample. Holy fucking shit that was yum! The texture was almost perfect. I settled on the conclusion that these were over proofed and that’s why they collapsed before going in the oven.
deflated, but good.
Alright, so what I’ve learned so far: Panettone is difficult. It will make you cry. Patience is a requirement, so is proper gluten development (in the face of such adversity as sugar and fat). Good yeast is important too, as is not over-proofing the dough. Also, there is quite a lot of luck involved.
Step 3 – try again…
Armed with my extensive knowledge of what not to do, I set out to try again. The good news was that my starter was pretty damn active (I really don’t know if that’s true… but it was definitely bubbly).
Again, I mixed the first dough the night before and let it rise for 12 hours.
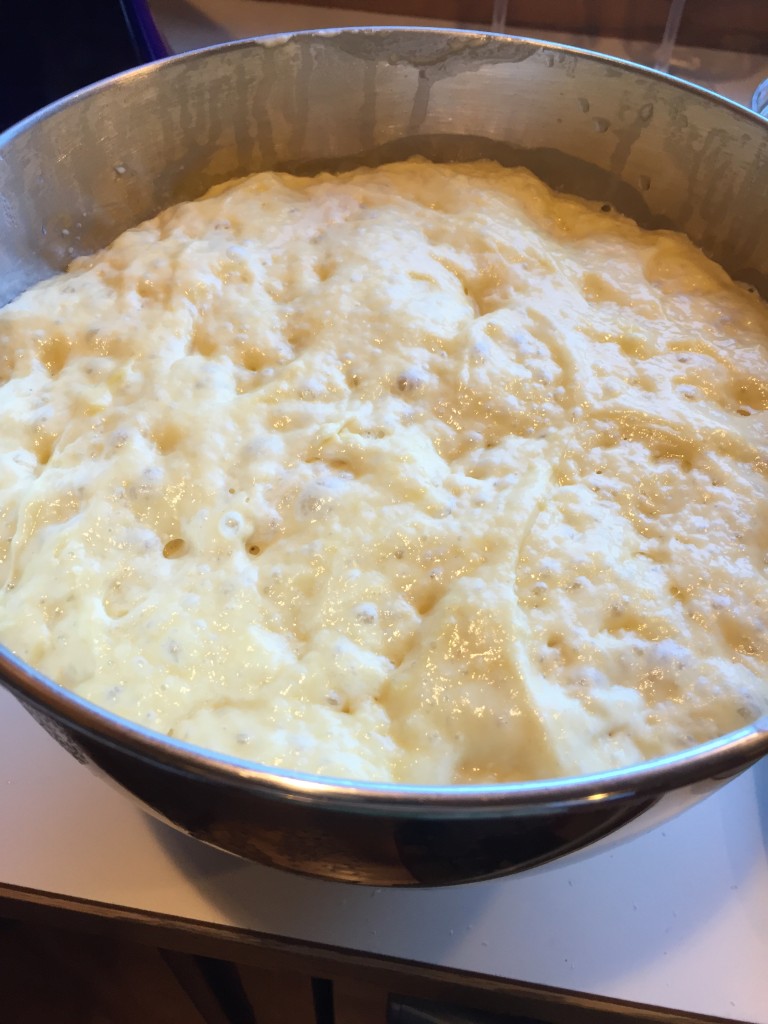
First dough, risen.
And I mixed the second dough for what seemed like forever, adding the sugar really, really slowly, checking the gluten “windowpane” along the way. (Sorry, no pictures). I let it ferment and folded it like a letter half way through. Here are some pictures of this crazy process. I’m probably doing it wrong, so, if you happen to be a bread expert, just, you know, be nice.
Stretch…
…and fold…
I divided it exactly into 2 500 gram loaves and 6 75 gram mini-loaves and let them rest.
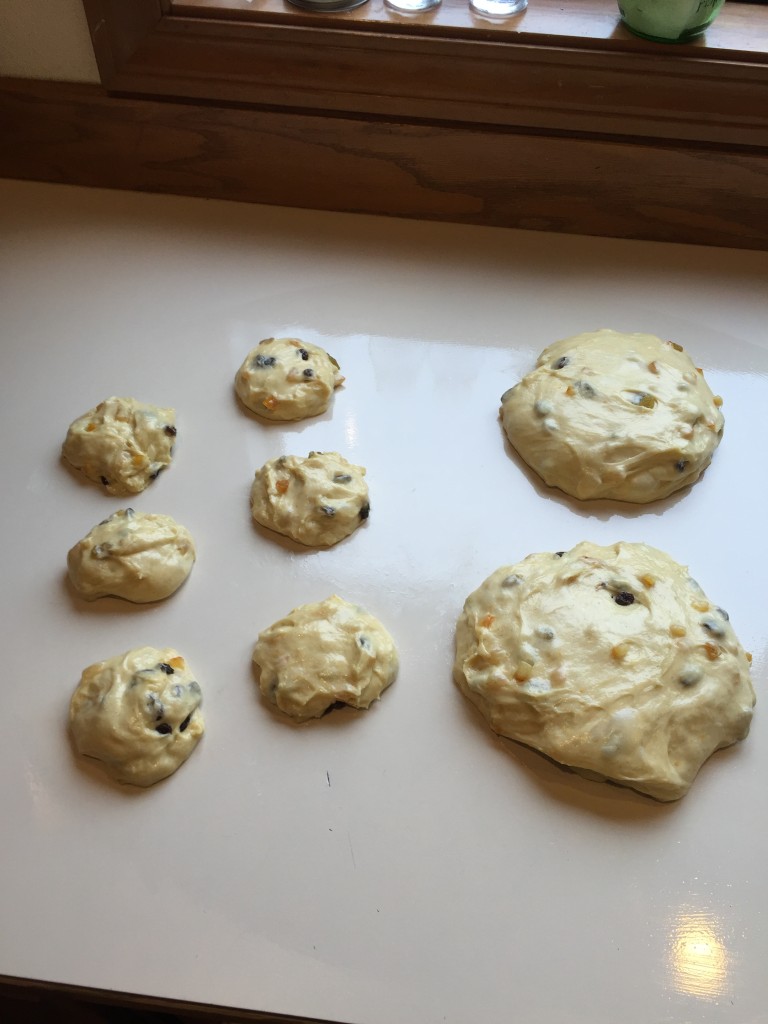
precious loaves
And I shaped them into tight balls. Maybe not tight, this dough is still really soft and sticky. But they looked pretty good. Here they are in the paper molds, ready for the proof.
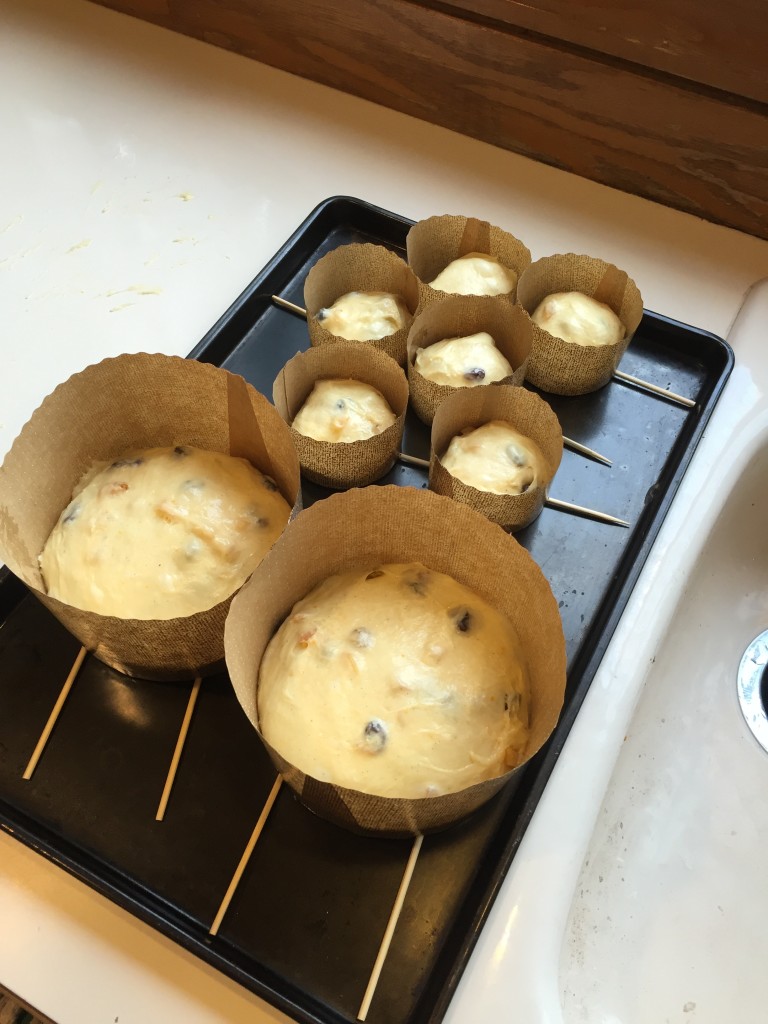
ready for the proof
They proofed pretty fast. Maybe due to my active starter or the right temperature. I don’t know. I’m not even sure if they were fully proofed because the dough is too sticky for the “finger test” (don’t ask).
Proofed, I hope.
And I crossed my fingers and snipped the tops and added a knob of butter. Truth is, I tried on the little ones first to make sure they didn’t collapse and was going to leave at least one big one alone, but I snipped them all and shoved them in the oven.
Snipped, with a knob of butter.
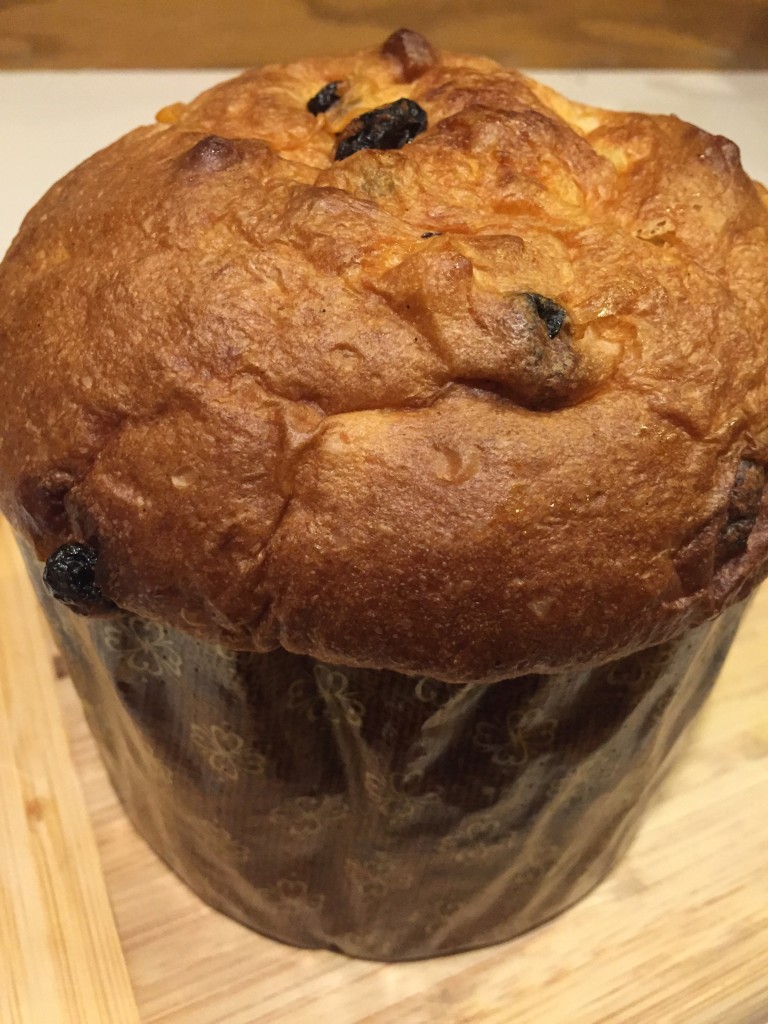
I basically sat in front of the oven for 30 minutes while they cooked. They puffed up in the oven (this is called “oven spring”, you guys!). I was so excited I could barely stand it. And then I realized that the little ones would probably be done before the big ones, so I had to get those out of the oven. And in the process of doing that, taking the internal temperature, etc. etc., one of the big ones started to fall. Thankfully, only one of the two fell and the other one turned out perfectly (as did all the mini’s).
just chillin’ upside down
I cried tears of joy. I wish that both breads had come out perfectly, but I learned don’t bake different size things in the oven if you are afraid something might fall. I think this is a good lesson for a souffle as well.
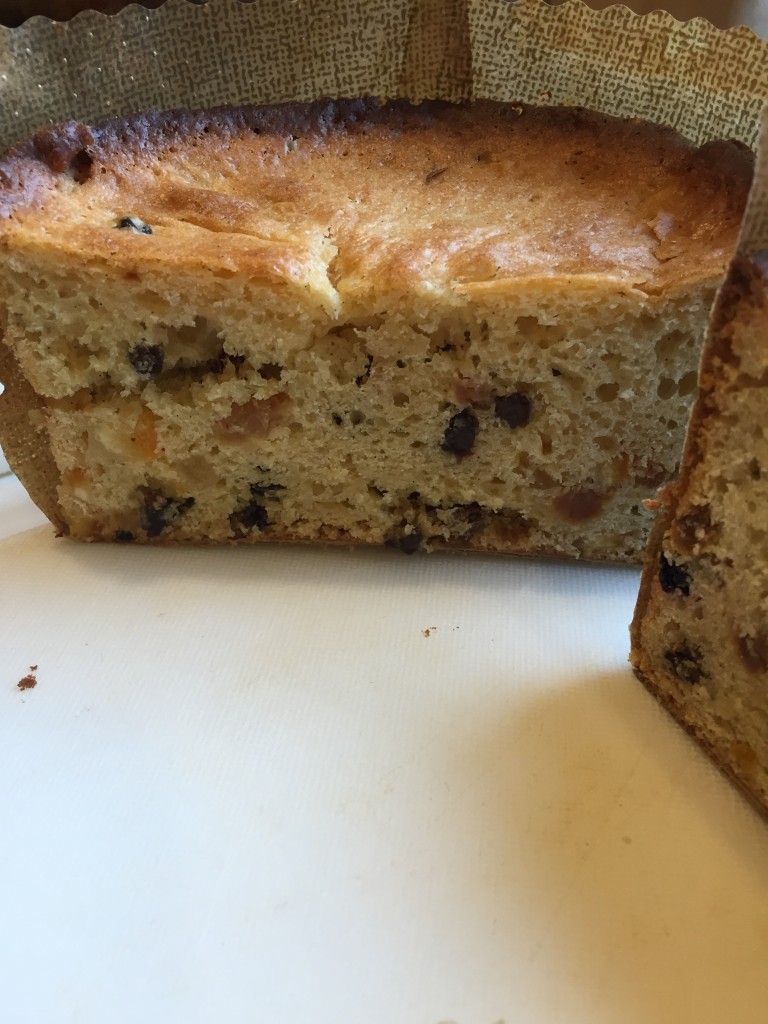
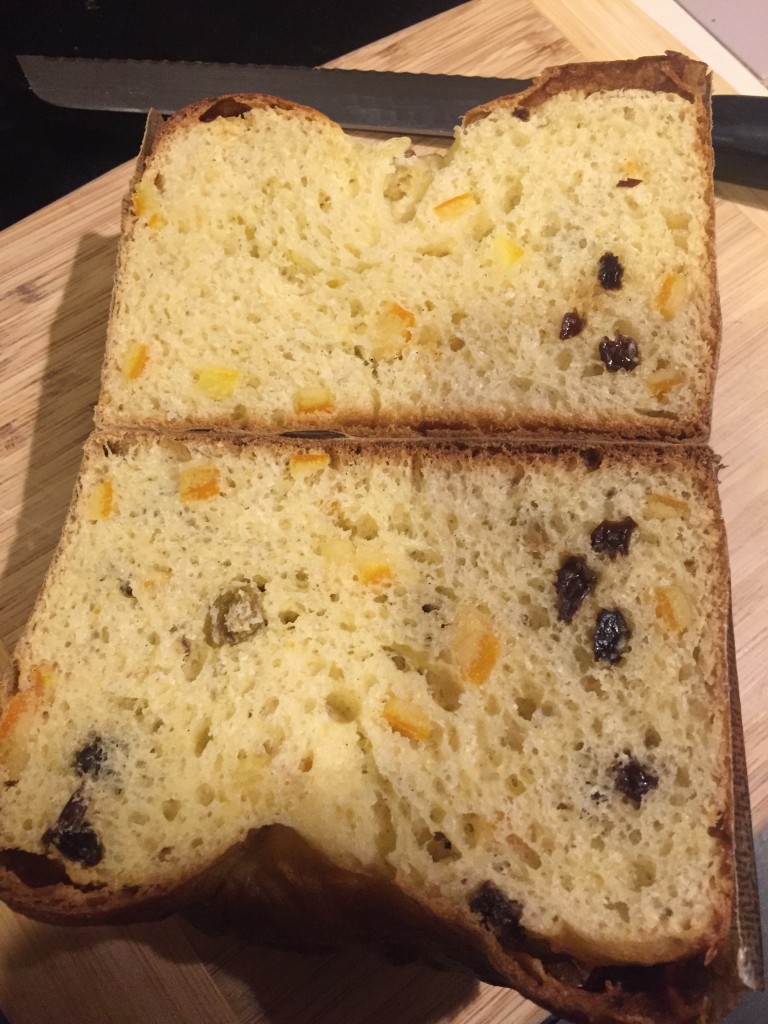
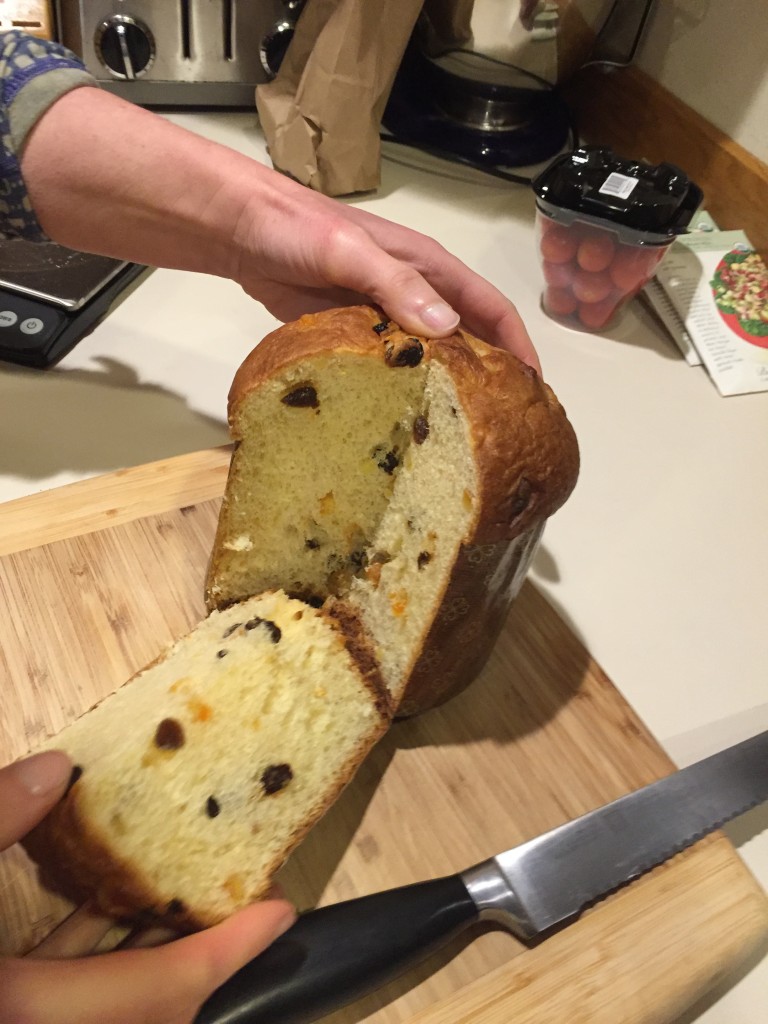
I’m not sure I mentioned this before, but panettone is supposed to “cure” for a couple of days to increase the flavor or something, so technically you can’t even check your work for another two days. We waited (being on a diet helps, because this isn’t diet food… you gotta work in these calories at a specific time). And here is the final result. I’m not sure it’s “perfect” and I’m sure that some panettone expert would have some constructive “feedback”, but I’m pretty proud of how these turned out. The flavor and texture are phenomenal.
panettone
the wedge
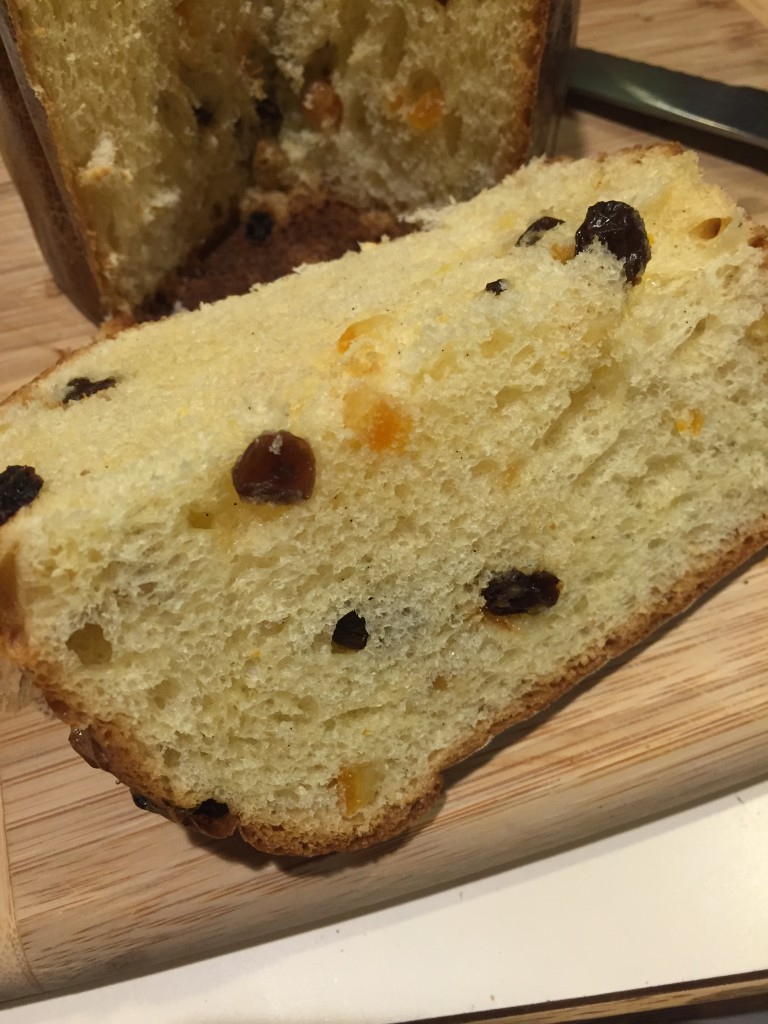
the crumb
Awesome post , looks like you are not allone with those troubles 😂.. we are still waiting for “oven spring” 😡